This was by far the best "dessert" I could have ever made a bunch of silly, fun-loving first graders.
If you're looking for a funny way to "trick" your students, make them some Brown-E's! I had to keep a straight face (it was so hard) when I told them I made them some "brownies."
I know I know.. it sounds evil.. but hey - they tried tricking me all day too telling me things like a spider's on the ceiling, I'm moving next week, my sister isn't really my sister.. and so on) :-)
Wednesday, April 2, 2014
Sunday, March 30, 2014
No-cost Student Letters
My students love to ask if they can color the letters for class bulletin boards instead of using pre-bought letters. It is an easy way for teachers to get students more involved with decorating the classroom and seeing more of their work around the room.
Sometimes they use crayons and different kinds of glitter to help design letters!
It's also a great way to save some money throughout the year!
Sometimes they use crayons and different kinds of glitter to help design letters!
It's also a great way to save some money throughout the year!
Thursday, March 27, 2014
Science - Living and Nonliving
Differentiate Living and Nonliving
Students can use magazines to cut out realistic living and nonliving things. After a science lesson this is a fun and easy way to assess your students to see if they understand the characteristics of both.
You will need:
T-chart template
Magazines
Scissors
Glue sticks
Students can use magazines to cut out realistic living and nonliving things. After a science lesson this is a fun and easy way to assess your students to see if they understand the characteristics of both.
You will need:
T-chart template
Magazines
Scissors
Glue sticks
Picture Cutouts
My students love seeing pictures of themselves around the room!
I have so much fun taking pictures of my students posing. I then cut out the background of the picture to use on bulletin boards!
The first picture shows my students taking a ride on our birthday bulletin board for our jungle theme!
They got so many giggles when they first saw their bodies taking a ride in a jeep!
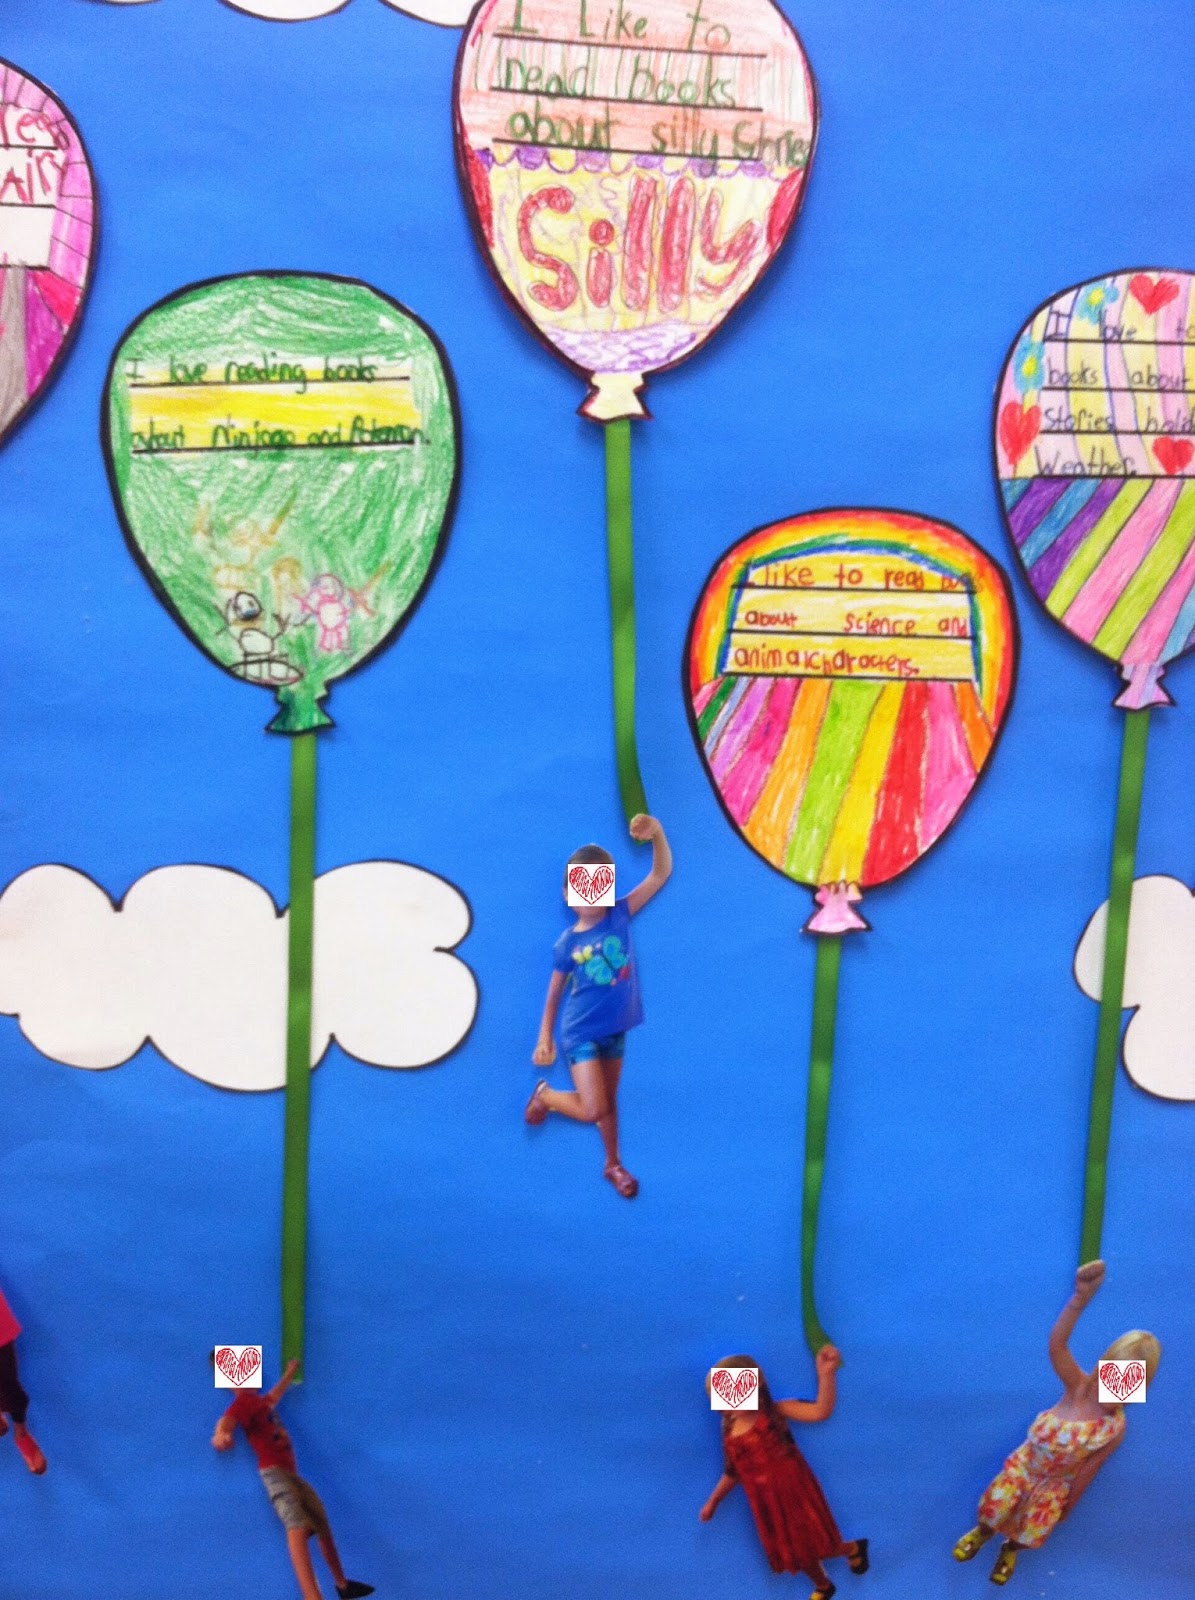
The next picture was for a bulletin board called "Getting Carried Away with Books." The kids wrote about their favorite kinds of books they have been reading. They pretended to pose as if a balloon was taking them far away into the sky!
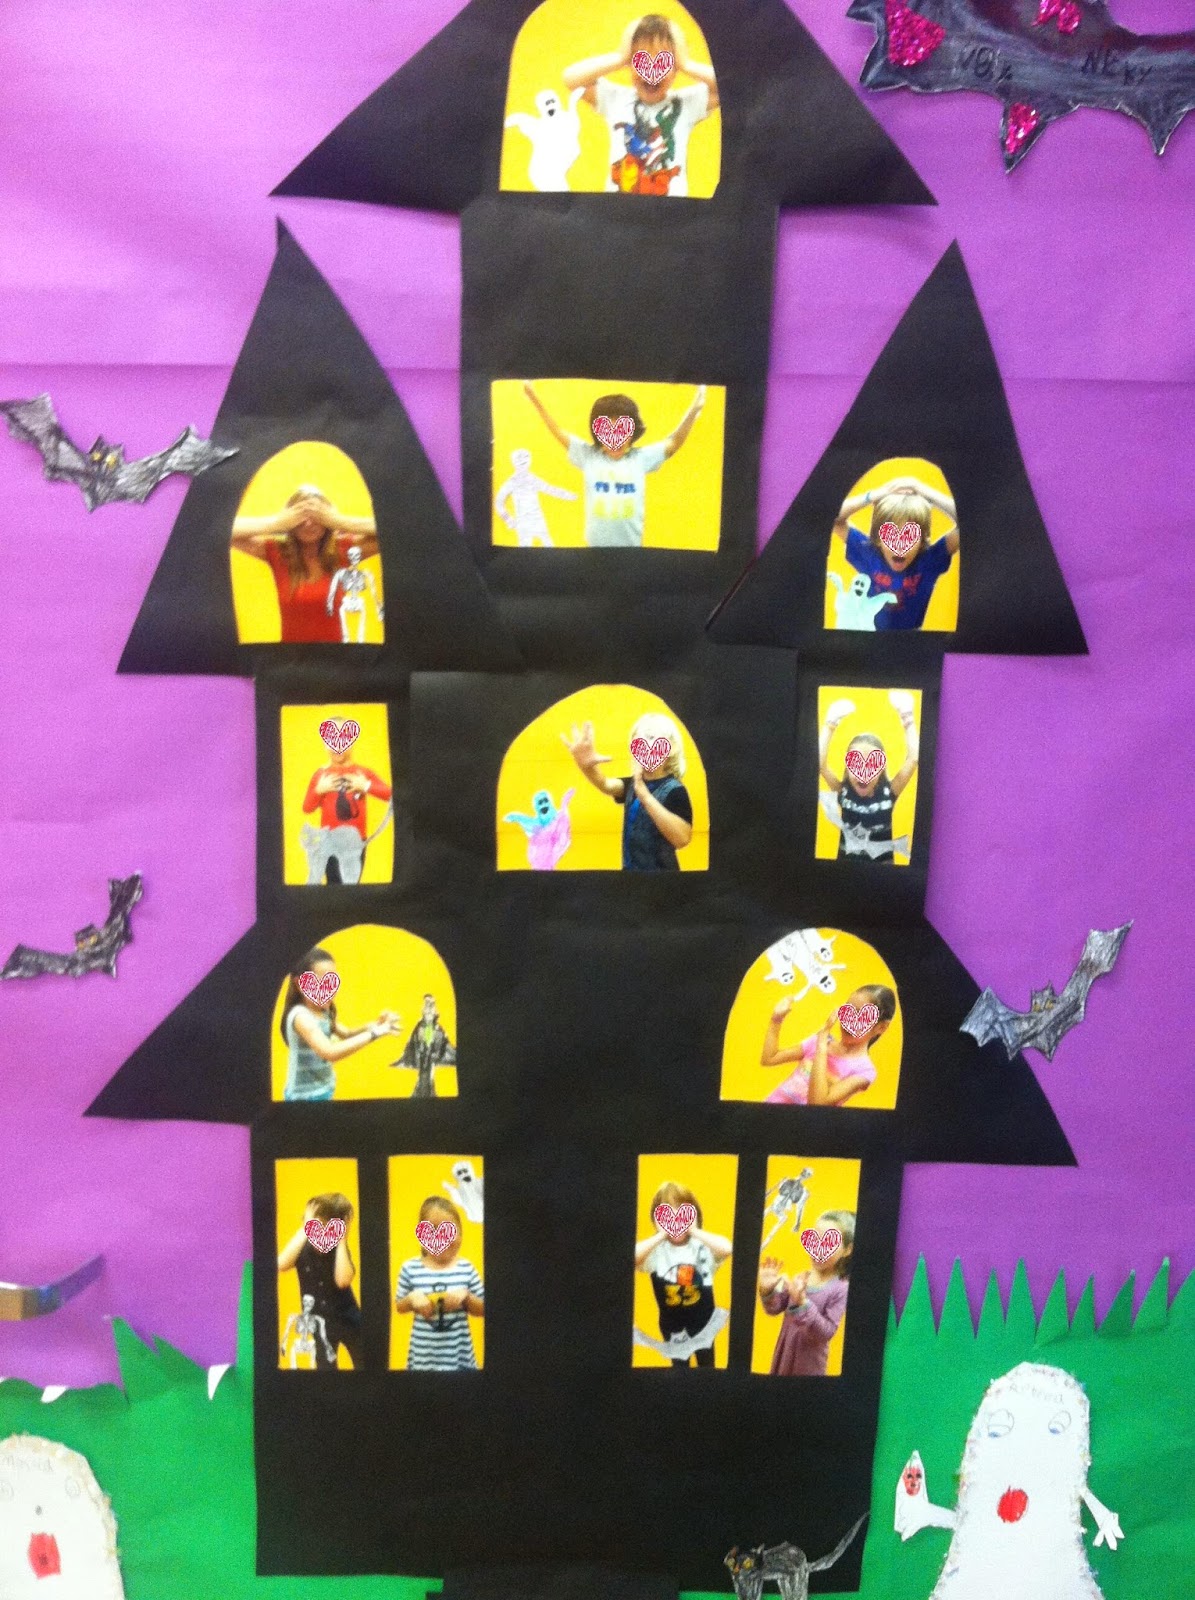
Above was for our Haunted House classroom door. The students made creepy and scary faces!
I use student cutouts throughout the entire school year.
It's such a hit! :)
I have so much fun taking pictures of my students posing. I then cut out the background of the picture to use on bulletin boards!
The first picture shows my students taking a ride on our birthday bulletin board for our jungle theme!
They got so many giggles when they first saw their bodies taking a ride in a jeep!

The next picture was for a bulletin board called "Getting Carried Away with Books." The kids wrote about their favorite kinds of books they have been reading. They pretended to pose as if a balloon was taking them far away into the sky!

Above was for our Haunted House classroom door. The students made creepy and scary faces!
I use student cutouts throughout the entire school year.
It's such a hit! :)
Wednesday, October 9, 2013
Classroom Timeline
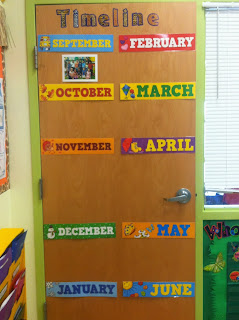
Every year, I love setting up a timeline of my class's year together. I have displayed this on walls, hallways or the back of my door, depending where I have some space for the year. In the hallway is my favorite because it gives everyone the chance to see our year in progress as they pass by.
You will need:
Monthly words (Dollar tree has a pack of 12 months for $1!!), a picture for each month, sentence strips to write about each month.
Every month, I take a classroom picture of something my students and I are enjoying together. I always start the first picture in September on the first day of school. I continue each month with days like Halloween, Valentine Exchange, projects, etc.
I choose a student to write a sentence about what we did each month on a strip and we place it under the picture. Throughout the year we visit our timeline and talk about what happened in the beginning, middle and end of the year.
At the end of the year, students have made calendars or classroom gifts for parents with these pictures for something extra you can do.
The parents love to see how much their children have grown throughout the year and love the end of the year presents as a plus!
 |
You will need:
Monthly words (Dollar tree has a pack of 12 months for $1!!), a picture for each month, sentence strips to write about each month.
Every month, I take a classroom picture of something my students and I are enjoying together. I always start the first picture in September on the first day of school. I continue each month with days like Halloween, Valentine Exchange, projects, etc.
I choose a student to write a sentence about what we did each month on a strip and we place it under the picture. Throughout the year we visit our timeline and talk about what happened in the beginning, middle and end of the year.
At the end of the year, students have made calendars or classroom gifts for parents with these pictures for something extra you can do.
The parents love to see how much their children have grown throughout the year and love the end of the year presents as a plus!
Monday, October 7, 2013
Bulletin Board Backgrounds
It's pretty common for teachers to use paper or fabric backgrounds but we all know they can both be expensive every year. I had some fun this year using rolled up beach mats for my word wall. It brings some dimension to the walls and it's perfect to use again next year! It also really goes perfectly with the jungle theme in my room!
You will need:
Rolled up beach mat (Walmart or 5 or below), stapler
I used a stapler to hang the beach mats and put the staples up vertically so they could easily pull out.
What else could you use for a background? Look on clearance racks for wallpaper, fabric tablecloths, and sheets!
Monday, September 30, 2013
Classroom Store
Looking for an educational management tool?
In my classroom we have "classroom store" as a positive way to reinforce great behavior. I call my classroom store "Monkey Business" because of the Jungle theme in my room.
You will need:
Hanging shoe organizer, plastic cups, play money, prizes for store
Throughout the week the students receive "money" (play money) for helping friends, having their belongings ready to go each day, listening to directions the first time, completing work on time, etc.
For example, when a student takes their pencil out of their pouch and is ready to go in the morning they earn 5 cents. Every time a student completes their work for each subject, they earn 5 cents. When they absolutely impress me they can earn a quarter! I have a chart in the room that tells what everything is worth.
I use a hanging shoe organizer to hold the student's money. Inside there is a cup so that it's easy to take out all coins when it's time for store.
Every other week, the classroom store opens and I take out all the items the students can purchase. (I have seen people do this once a month which could be great for older students.)
In the classroom store there are 3 baskets. One that is labeled $1.00, one that is labeled $2.00, and the other is $3.00.
The larger the prizes, the more money the student must need to "buy" from store.
During this time, students are able to practice coin recognition, value of coins, and counting. I call students one by one to my desk and we count their money together. I ask them all about coins and values as we are counting.
The most amazing days in store are when a student tells me they don't want to buy anything that week because they want to save to buy something from the bigger bin the next time. :-)
Tuesday, September 24, 2013
Personal Student Book Boxes
I used to use large ziplock bags for students to hold their SSR books in. They ripped and became old-looking in a matter of weeks. I decided to try out book boxes and the kids are very organized with them!
You will need:
Cardboard Magazine Holders (Target sells them for $1 during certain times of the year in the front of the store)
Each student has their own book box with their picture of them reading one of their favorite books. Inside they have their SSR books and a folder that contains their reading logs and reading response journal.
I love the personal reading pictures because they are a reminder to the students of what an amazing reader looks like! :-)
Monday, September 23, 2013
Class Pet
Every year I always think about buying a class pet for my students. This year I decided to bring in "Iggy," our classroom Iguana. He requires no food, cage or maintenance! He is a plastic toy that has no fur and is easy to clean. The kids love him!
You will need:
Plastic Animal, Writing Journal, Letter written from pet glued into writing journal
Every Friday, a student takes Iggy home with a special writing journal to tell us all about what they did with Iggy over the weekend. Students write about what they did with Iggy and can take pictures or draw a picture of them with Iggy!
 |
| Can you see Iggy jumping over my student's head into the pool?? :) |
Monday, September 16, 2013
"Make a Move" Transition Cup
A smooth transition makes for a fast and fun way to move from one place to another in the classroom. Having fun transitions from our seats or to the rug eliminates the time for kids to start chatting or wandering.
My students and I decided to come up with a list of their favorite transitions that we already did each day. We came up with an AWESOME list and I even had some of my older students from previous years pitch in their fun ideas.
You will need:
popsicle sticks, sharpie, glitter, glue, cup to put popsicle sticks in
I wrote each transition onto a colored popsicle stick and added some glue & glitter to the end of each. The glitter side helps to show me which transitions we already did. Every time I pull out a popsicle stick, I turn it over so that the glitter side is facing the bottom of the cup. This ensures no constant repeats of the same transition!
Transition List:
When we ran out of ideas, I went on Pinterest to see if anyone else had a list of transitions and I was able to find a few that I did not have yet from a pin named ACTION CUP. Spaghetti arms and galloping like a horse were great additions to our list from this helpful site!
Kids LOVE when they get to pick from the cup and it is a fun way to have some fun without losing lesson time!
My students and I decided to come up with a list of their favorite transitions that we already did each day. We came up with an AWESOME list and I even had some of my older students from previous years pitch in their fun ideas.
You will need:
popsicle sticks, sharpie, glitter, glue, cup to put popsicle sticks in
I wrote each transition onto a colored popsicle stick and added some glue & glitter to the end of each. The glitter side helps to show me which transitions we already did. Every time I pull out a popsicle stick, I turn it over so that the glitter side is facing the bottom of the cup. This ensures no constant repeats of the same transition!
Transition List:
Roller skate
Monster walk
Raise the roof
Swim in a pool
Hula dance
Gallop like a horse
Tap your head
Fly like a plane
Hop on one foot
Buzz like a foot
Slide your feet
Be an elephant
Act like a chicken
Pop like a popcorn
March
Wiggle like a worm
Stomp your feet
Do outer space walk
Do jumping jacks
Fly like a bird
Pump some iron
Walk like an Egyptian
Spaghetti arms
Disco Dance
Brush your teeth
Climb a ladder
Drive a car
Pat your knees
Dribble a basketball
Tip toe
Twist like a tornado
Fly like a butterfly
Surf on a surfboard
Move like a robot
Run in slow motion
Hop like a bunny
Jump like a frog
Movie star kisses
Alligator clap
Be a monkey
Skip
Waddle like a penguin
Act like a dinosaur
Fancy walk
Tap your shoulders
Clap your hands
Growl like a tiger
Be a cowboy/cowgirl
When we ran out of ideas, I went on Pinterest to see if anyone else had a list of transitions and I was able to find a few that I did not have yet from a pin named ACTION CUP. Spaghetti arms and galloping like a horse were great additions to our list from this helpful site!
Kids LOVE when they get to pick from the cup and it is a fun way to have some fun without losing lesson time!
Sunday, September 15, 2013
Star Student Chair Covers
My coworker brought up using a pillowcase to cover a star student's chair. I decided to make one to go along with my classroom theme. Instead of a star student, I used King/Queen of the Jungle.
You will need:
Iron-on letters, Iron-on Patch, pillowcase, iron, ironing board
Using a decorated pillowcase may be a great way to cover your student's classroom chair, but feel free to decorate it too! (Patches, Puffy paint, iron-on letters) If you are using iron-on letters as I did, cut each letter out and place them where you would like them to be. Use a cloth over the letters as you iron over them. After you are finished with the front, turn the pillowcase inside out and iron over the letters from the back. When you see the letters have stuck, wait a few minutes. Peel the backing of the letters off SLOWLY. You will be so excited once your new pillowcase is done!
My kids can't wait to find out who the next King/Queen of the Jungle is already so they can have the "cool chair!"
 |
| Teachers making pillowcases for our classrooms :) |
Saturday, September 14, 2013
Decorated Clothespins
Kids work super hard to produce their best work. Why hang it up with just some plain clothespins?
I use clothespins to hang up work and to keep track of classroom jobs/book nook spots. Every time I go to move them, I appreciate them more than ever now that they are decorated and fun-looking. :-)
You will need:
Bag of Clothespins (Walmart sells huge bag for $2, paint or spraypaint, medium paintbrush, thin paintbrush)
Paint the clothespins with a color of your choice. Bright colors really make student work pop out. You can keep just the solid base color or you can have some fun and put some polka dots, patterns, glitter, or any other designs to make your clothespins more exciting!
Happy Clothespinning!
I use clothespins to hang up work and to keep track of classroom jobs/book nook spots. Every time I go to move them, I appreciate them more than ever now that they are decorated and fun-looking. :-)
 |
| Jungle Theme Clothespins |
You will need:
Bag of Clothespins (Walmart sells huge bag for $2, paint or spraypaint, medium paintbrush, thin paintbrush)
Paint the clothespins with a color of your choice. Bright colors really make student work pop out. You can keep just the solid base color or you can have some fun and put some polka dots, patterns, glitter, or any other designs to make your clothespins more exciting!
Happy Clothespinning!
Wednesday, September 11, 2013
Free Storage For Your Books/Supplies
The bell went diiiiinggg in my mind when I was in a local store nearby in the school aisle. I saw a bunch of those holders that stores use to put folders, books and any other school supplies in.... EMPTY!!
I asked management if I could take some and they said absolutely! I didn't pay a dime and I walked out with a cart full of storage for my classroom! Places like Kmart, Walmart and Target are probably your best bet!
I took them into my classroom and used one small piece of decorated duct tape around the box to label each storage unit. I use them in my classroom for both book and folder holders.
Teacher on a budget = winning.
Tuesday, September 10, 2013
Make Your Own Storage Seats
So I saw them all over Pinterest and HAD to finally do them myself!!
These seats are awesome for storage and are really convenient for kidney tables/long work tables since you can push them in or move them around easily.
You will need:
A few yards of material, plastic file crates (Walmart/Target sells them for $4 each), Pillow or Sponge, Flat piece of wood for each crate, heavy duty stapler, scissors
Step 1: Cut your flat piece of durable flat wood to fit the inside corners of the crate. This needs to fit perfectly so that the wood can rest easy on the crate.
Step 2: Take a piece of long sponge/small cushion and place it on top of the wood. Take the material and cover the wood and sponge. Turn the entire thing around and staple the bottom to secure the cushion/sponge inside.
**Make sure you leave enough material before you cut it to staple it to the wood.
Step 3: After stapling all around the bottom of the cushion, turn the seat around and securely fit it into the crate. You can take a piece of material and attach it to the side of the wood so that you can make a flap to lift up the seat easily, or you can just lift it up through the hole of the crate.
Material is super expensive so if you have any extra material, make a pillow or two!
 |
| Choose a fun fabric! My classroom is a Jungle Theme so I went with some animal print! |
You will need:
A few yards of material, plastic file crates (Walmart/Target sells them for $4 each), Pillow or Sponge, Flat piece of wood for each crate, heavy duty stapler, scissors
Step 1: Cut your flat piece of durable flat wood to fit the inside corners of the crate. This needs to fit perfectly so that the wood can rest easy on the crate.
Step 2: Take a piece of long sponge/small cushion and place it on top of the wood. Take the material and cover the wood and sponge. Turn the entire thing around and staple the bottom to secure the cushion/sponge inside.
**Make sure you leave enough material before you cut it to staple it to the wood.
Step 3: After stapling all around the bottom of the cushion, turn the seat around and securely fit it into the crate. You can take a piece of material and attach it to the side of the wood so that you can make a flap to lift up the seat easily, or you can just lift it up through the hole of the crate.
Material is super expensive so if you have any extra material, make a pillow or two!
 |
| How fun are these! |
Monday, September 9, 2013
Do-It-Yourself Paper Holders
Paper holders can be very expensive for the classroom. Do-it-yourself paper holders will cost you about $4.00 for one!
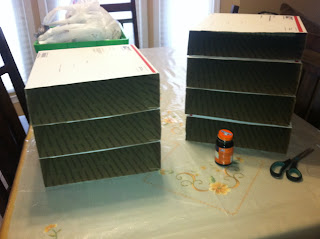
You will need:
For one holder: 4 Priority shipping boxes from the post office, decorated duct tape, glue, scissors
The best part about this project is that the priority shipping boxes are free! Go to your local post office and pick up a few boxes to create this inexpensive organizational tool.
First you need to put each shipping box together. Since the flaps will hang out, cut them off to look as smooth as you can. Once you have your shipping boxes assembled, stack each box, gluing each to the other, one by one. Do this until all boxes are connected.
Here comes the fun part! Take a roll of decorated duct tape and start from the back side. I didn't bother doing the back of the boxes since they will be facing the wall in my classroom. Tape the box slowly, keeping it nice and neat as you wrap around the boxes.
For the insides of the box, I cut slits to allow the inside of the box to have a little decoration too.
Happy paper storing!
Subscribe to:
Posts (Atom)
